Quality control of products is an essential part of the property management system. At each stage of production, there are specific requirements for different types of products, and hence for the materials used. Initially, the main requirements were mainly accuracy and strength, but with the development of industry and the complication of manufactured equipment, the number of characteristics for which it can be rejected has increased many times.
Checking the functional abilities of products without destroying them has become possible thanks to the improvement of non-destructive testing methods. The types and methods of conducting it allow you to evaluate various parameters without violating the integrity of the product, and therefore, as accurately as possible. Today, not a single technological process for the production of responsible products without a well-formed control system has the right to be introduced into the industry.
The concept of non-destructive testing
This process is understood as a set ofsuch tests to which the object is directly subjected, while maintaining its performance without any damage to the material. All types and methods of non-destructive testing that exist today have the main purpose of ensuring industrial safety by monitoring the technical condition of equipment, buildings and structures. They are carried out not only at the stage of production (construction), but also for timely and high-quality maintenance and repair.
Thus, various types of non-destructive testing according to GOST can measure the geometric parameters of products, evaluate the quality of surface treatment (for example, roughness), the structure of the material and its chemical composition, the presence of various defects. The timeliness and reliability of the data obtained allows you to adjust the technological process and produce competitive products, as well as prevent financial losses.
Inspection requirements
In order for the results of all types of non-destructive testing to be relevant and effective, it must meet certain requirements:
- the possibility of its implementation at all stages of manufacture, during the operation and repair of products;
- control should be carried out on the maximum possible number of the given parameters for a particular production;
- time spent on inspection should be reasonably correlated with other steps in the production process;
- the reliability of the results must be very high;
- byopportunities for technological process control should be mechanized and automated;
- reliability of devices and equipment used in non-destructive testing, types and conditions of their use should be varied;
- simplicity of methods, economic and technical availability.
Applications
The whole variety of types and methods of non-destructive testing according to GOST is used for the following purposes:
- detection of defects in critical parts and assemblies (nuclear reactors, aircraft, underwater and surface watercraft, spacecraft, etc.);
- defectoscopy of devices designed for long-term operation (port facilities, bridges, cranes, nuclear power plants and others);
- research by methods of non-destructive testing of metals, types of their structures and possible defects in products to improve technology;
- continuous control over the occurrence of defects in aggregates and devices of the highest responsibility (for example, boilers of nuclear power plants).
Classification of types of non-destructive testing
Based on the principles of operation of equipment and physical and chemical phenomena, all methods are divided into ten types:
- acoustic (in particular, ultrasonic);
- vibroacoustic;
- with penetrants (capillary and leak control);
- magnetic (or magnetic particle);
- optical (visual-optical);
- radiation;
- radio wave;
- thermal;
- electric;
- Eddy current (or electromagnetic).
According to GOST 56542, the types and methods of non-destructive testing listed above are further subdivided according to the following criteria:
- peculiarities of the interaction of substances or physical fields with a controlled object;
- primary parameters providing information;
- get primary information.
Acoustic methods
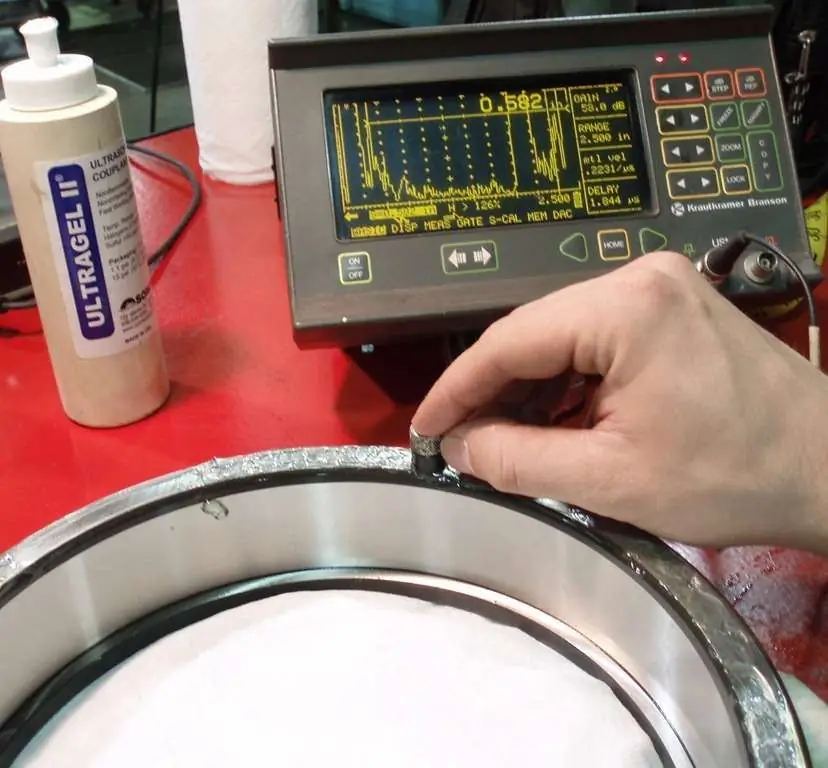
In accordance with the classification of types and methods of non-destructive testing in accordance with GOST R 56542-2015, this type is based on the analysis of elastic waves that are excited and (or) arise in a controlled object. If a frequency range greater than 20 kHz is used, the term "ultrasonic" may be used instead of "acoustic".
The acoustic type of non-destructive testing is divided into two large groups.
First - methods based on the emission and reception of acoustic waves. For control, traveling and standing waves or resonant vibrations of the controlled object are used. These include:
- Shadow method. The presence of a defect is detected due to the attenuation of the received signal or the delay in its registration due to the rounding of the defect by ultrasonic waves.
- Echo method. The existence of a defect is determined by the time of arrival of the signal reflected by the defect and the surfaces of the object, which makes it possible to determine the location of the defect in the volume of the material.
- Mirror-shadow method. It is a variation of the shadow method, which uses equipment fromecho method. A weak signal is also a sign of a flaw.
- Impedance method. If there is a defect in the product, then the impedance of a certain area of its surface decreases, as if it softens. This affects the amplitude of the rod oscillations, the mechanical stress at its end, the phase of the oscillations and the shift in their frequency.
- Resonance method. Important for measuring film coating thickness. The defect is found by moving the finder along the surface of the product, indicating a weakening of the signal or the disappearance of resonance.
- Method of free vibrations. In the course of testing, the frequencies of natural oscillations of the sample, which occur as a result of impact on it, are analyzed.
The second group includes methods based on the registration of waves arising in products and materials:
- Acoustic emission. It is based on the registration of waves that occur during the formation and development of cracks. Dangerous defects lead to an increase in the frequency and amplitude of signals in a specific frequency range.
- Noise-vibration method. It consists in observing the frequency spectrum of the mechanism or its parts during operation.
Types and methods of non-destructive testing from the classification given above are used for a variety of purposes. To determine the parameters of rolled metal of small thickness, rubber products, fiberglass, concrete, the shadow method is best suited. Its significant disadvantage is the need for access to the product from two sides. With one-way access tothe sample can use the mirror-shadow or resonance methods. These two types are well suited for non-destructive testing of welded joints, as well as acoustic emission. The impedance method, as well as the free vibration method, checks the quality of glued and soldered products made of glass, metal and plastic.
Capillary methods
According to the classification of types and methods of non-destructive testing in accordance with GOST R 56542-2015, capillary methods are related to the examination by penetrating substances.
They are based on the penetration of drops of special liquids, called indicator, into the cavity of defects. The method is reduced to cleaning the surface of the part and applying a penetrating liquid to it. In this case, the cavities are filled, after which the liquid is removed from the surface. The rest of it is detected using a developer, which forms an indicator pattern of the location of defects.
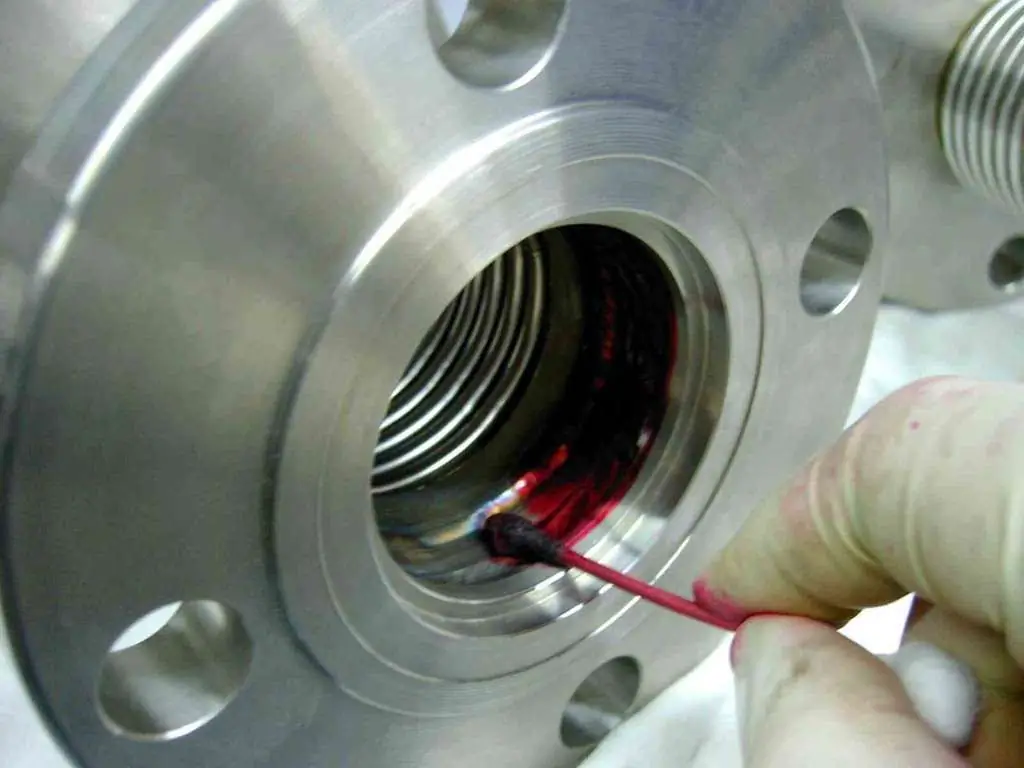
The sensitivity of the capillary type of non-destructive testing largely depends on the choice of flaw detection materials, which makes their preliminary verification mandatory. The indicator abilities of solutions are checked against some standard solutions. The whiteness of developers is checked by comparison with a barite plate (whiteness standard).
The advantage of capillary methods is the possibility of their use in field and laboratory conditions with different ambient temperatures. However, they are only able to detect surface defects with unfilled cavities. Capillary methods are applicable fordetection of defects in metal and non-metal parts of various shapes.
Magnetic methods
They are based on the registration of magnetic fields arising above the defect, or on the determination of the magnetic properties of the studied products. Magnetic methods allow you to find cracks, rolls and other defects, such as the mechanical features of ferromagnetic steels and cast irons.
The classification of non-destructive types and methods of control available in GOST provides for the division of magnetic into the following subspecies:
- magnetographic (registration of fields is carried out with a ferromagnetic film as an indicator);
- magnetic particle (analysis of magnetic fields is carried out with a ferromagnetic powder or magnetic suspension);
- magnetoresistor (registration of stray magnetic fields is carried out by magnetoresistors);
- induction type of magnetic non-destructive testing (the magnitude or phase of the induced EMF is monitored);
- ponderomotive (the force of magnet recall from a controlled object is recorded);
- ferroprobe (based on the measurement of magnetic field strength using fluxgates);
- Hall effect method (magnetic fields are registered by Hall sensors).
Optical methods
The type of non-destructive testing based on the action of light radiation on an object with the registration of the results of this action is called optical. Conventionally, there are three groups of methods:
Visual (as well as the visual-optical method) is based on the personal qualities of the operator (laboratory assistant): experience, skill, vision. It is very accessible and easy to perform, which explains its ubiquity. Visual control is carried out without any optical means. It is effective on large objects to detect gross flaws, violations of geometry and dimensions. Visual-optical analysis is carried out with optical aids such as a magnifying glass or microscope. It is less productive, so it is usually combined with visual
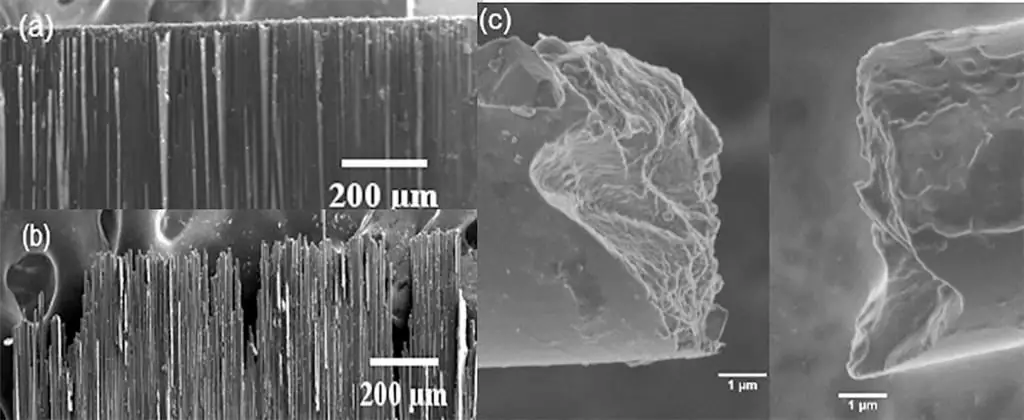
- Photometric, densitometric, spectral and television methods are based on instrumental measurements and are less subjective. These types of optical non-destructive testing are indispensable for measuring geometric dimensions, surface areas, controlling the attenuation coefficient, evaluating transmission or reflectivity, flaw detection.
- Interference, diffraction, phase contrast, refractometric, nephelometric, polarization, stroboscopic, holographic methods are based on the wave properties of light. They can be used to control products made from materials that are transparent or translucent to light radiation.
Radiation methods
Based on the effect of ionizing electromagnetic radiation on an object, followed by registration of the parameters of this action and summing up the results of control. For the radiation type of non-destructive testing, various radiations are used, which make it possible to describe their quanta by the following physical quantities: frequency, wavelength orenergy.
Passing through the product, X-ray or gamma radiation, as well as neutrino fluxes, are attenuated to varying degrees in sections with and without defects. They allow you to judge the internal presence of flaws. They are successfully used to check welded and soldered seams, rolled products.
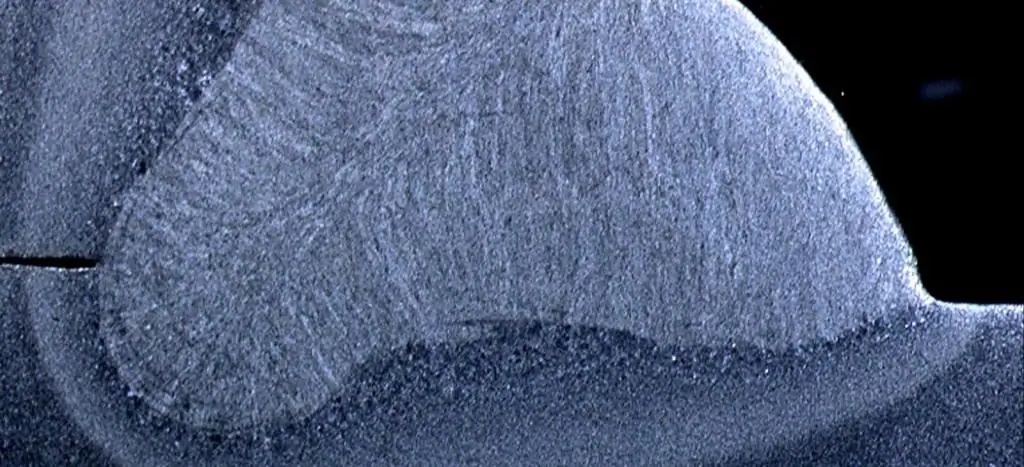
Radiation types of non-destructive testing carry a biological hazard, acting covertly. This requires compliance with organizational and sanitary norms of labor protection and safety regulations.
Thermal Methods
An important parameter is the registration of changes occurring in the thermal or temperature fields of the analyzed sample. For control, the temperature and differences in the thermal characteristics of the object are measured.
NDT thermal view can be passive or active. In the first case, the samples are not affected by external heat sources, and the temperature field is measured at the operating mechanism. An increase or decrease in temperature in some places may indicate the presence of some kind of flaws, such as cracks in engines. With active thermal control, materials or products are heated or cooled, and the temperature is measured from its two opposite sides.
To obtain accurate and objective data, the following primary measuring transducers of thermal radiation are used: thermometers, thermocouples, thermal resistances, semiconductor devices, electronic vacuum devices, pyroelectric elements. Often, indicators of thermal fields are used, which areplates, pastes, films of thermosensitive substances that change when certain temperatures are reached. So, melting thermal indicators, color-changing thermal indicators and phosphors are isolated.
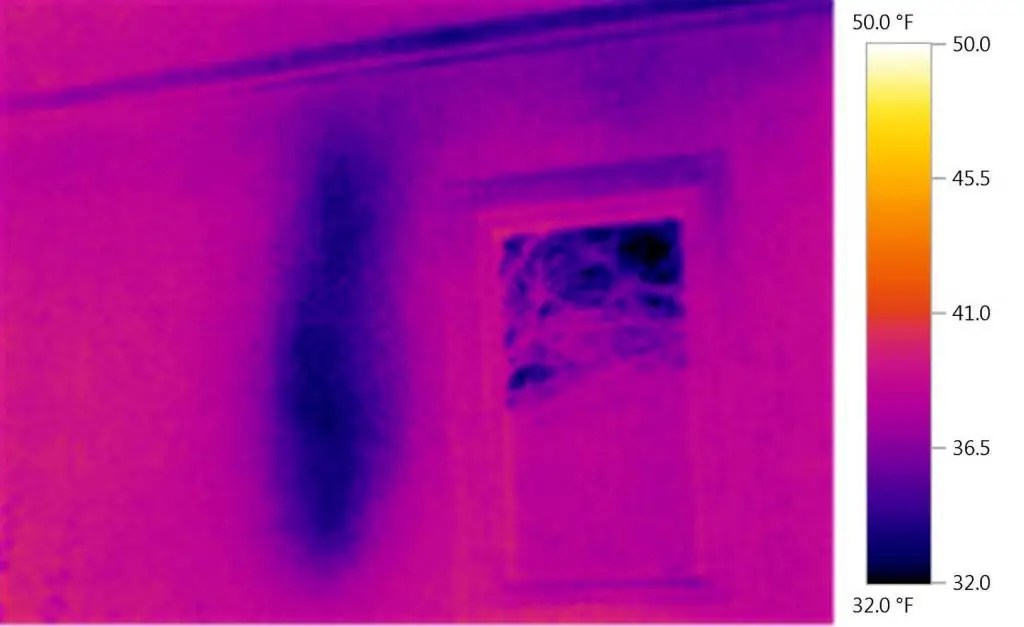
Through the use of special equipment, thermal methods make it possible to measure the physical and geometric parameters of objects without contact at fairly large distances. They also allow to detect chemical and physical pollution, roughness, coatings on their surfaces, based on the values of the thermal emissivity.
Leak detection methods
According to the main classification of types of non-destructive testing, this method refers to testing samples with penetrating liquids. Leak detection reveals through defects in products and structures by the penetration of test substances through them. Often referred to as leak control.
Liquids, some gases, vapors of liquids can serve as test substances. According to this parameter, leak detection control methods are divided into liquid and gas. Gases provide greater sensitivity, which means they are used more often. Also, the sensitivity of the method is affected by the equipment used. Vacuum technique in this case is the best option.
To detect leaks, special devices called leak detectors are needed, but in some cases non-device methods of leak detection are also suitable. To control this method, the following leak detectors are used:
- Mass spectrometry - characterized by the greatestsensitivity and versatility, allows you to examine products of various dimensions. All this explains its wide application. But the mass spectrometer is a very complex and bulky instrument that requires a vacuum to operate.
- Halogen, whose action is based on a sharp increase in the emission of alkali metal cations when halogens appear in the test substance.
- Bubble - is based on the detection of test gas bubbles released from a leak during gas pressure testing of a controlled object, with liquid applied to its surface or immersed in a tank. This is a fairly simple method that does not require complex instruments and special gases, but provides high sensitivity.
- Manometric - allows you to evaluate the tightness of the test object by pressure gauges that measure the pressure of test gases.
Electrical Methods
This type of non-destructive testing according to GOST R 56542-2015 is based on the analysis of the parameters of the electric field (or current) acting on the controlled object or arising in the object due to external influence.
Informative parameters in this case - electric capacity or potential. To control dielectrics or semiconductors, the capacitive method is used. It allows you to analyze the chemical composition of plastics and semiconductors, detect discontinuities in them, and evaluate the moisture content of bulk materials.
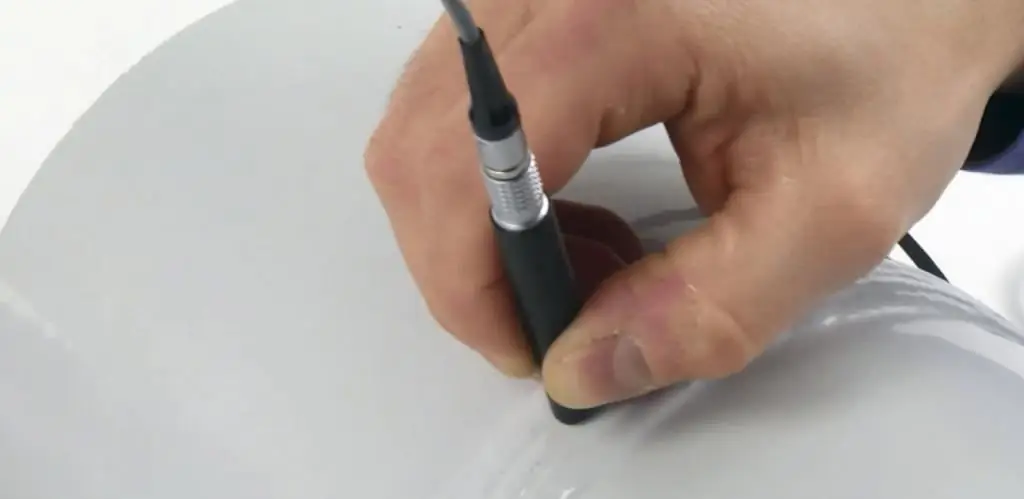
Control of conductors is carried out by the method of electric potential. In this case, the thickness of the conductive layer, the presence of discontinuitiesnear the surface of the conductor is controlled by measuring the potential drop in a particular area.
Eddy current method
Has another name - the eddy current method. It is based on changes in the action of the electromagnetic field of a coil with a field of eddy currents induced by this coil in a controlled object. Suitable for detecting surface defects of magnetic and non-magnetic parts and semi-finished products. Also allows you to find cracks on products of various configurations.
The value of the eddy current method is that neither humidity, nor pressure, nor pollution of the environment, nor radioactive radiation, and even contamination of the object with non-conductive substances have practically no effect on the measuring signal. Its areas of application are as follows:
- Checking the linear dimensions of products (for example, the diameter of a bar, pipes, metal sheet thickness, body wall thickness).
- Measuring the thickness of applied coatings (range from micrometer to tens of millimeters).
- Determination of deviations in the composition and structure of metals and alloys.
- Determination of mechanical stress values.
Advantages and disadvantages of non-destructive methods
Despite the fact that both types of testing, destructive and non-destructive, have their pros and cons, in modern production conditions the latter has a number of advantages:
- Tests are carried out immediately on products that will be used in working conditions.
- Survey can be done on any part or sub-assembly intended for real-world use, butif it is economically justified. Often it can be done even when the batch is characterized by large differences between parts.
- You can test the whole part or only the most dangerous parts of it. Depending on the convenience of conducting or technological conditions, they can be performed simultaneously or sequentially.
- The same object can be tested by many non-destructive testing methods, each of which will be sensitive to certain properties or parts of the part.
- Non-destructive methods can be applied to the unit under operating conditions, and there is no need to stop its operation. They do not cause disturbances and changes in the characteristics of the parts.
- Testing allows you to re-inspect the same parts after any period of time. This makes it possible to establish a connection between the operating modes and the resulting damage and their degree.
- Non-destructive testing allows parts made from expensive materials not to be damaged.
- As a rule, tests are carried out without pre-treatment of samples. Many analytical devices are portable and fast, and often automated.
- The cost of non-destructive testing is lower than that of destructive methods.
- Most of the methods do not require a long time and require less man-hours. Such methods should be used to determine the quality of all details if their cost is less than or comparable to the cost of conducting a destructive survey.only a small percentage of parts in the entire batch.
There are not so many disadvantages of non-destructive testing methods:
- Usually, indirect properties are analyzed that do not have a direct connection with the values during operation. For the reliability of the results, an indirect relationship is found between the obtained data and operational reliability.
- Most of the tests do not indicate the life of the object, but are only able to follow the processes of destruction.
- To decipher and interpret the results of analytical work, it is also necessary to carry out the same studies on special samples and under special conditions. And if the relevant link between these tests is not obvious and proven, then observers may not agree with it.
We analyzed the types of non-destructive testing, its features and disadvantages.

