In order for parts and mechanisms to serve for a long time and reliably, the materials from which they are made must meet the necessary working conditions. That is why it is important to control the permissible values of their main mechanical parameters. Mechanical properties include hardness, strength, impact strength, ductility. The hardness of metals is a primary structural characteristic.
Concept
The hardness of metals and alloys is the property of a material to create resistance when another body penetrates into its surface layers, which does not deform and does not collapse under accompanying loads (indenter). Defined with the purpose:
- obtaining information about acceptable design features and operating possibilities;
- analysis of the state under the influence of time;
- monitoring the results of heat treatment.
The strength and resistance of the surface to aging partially depend on this indicator. Explore as originalmaterial and finished parts.
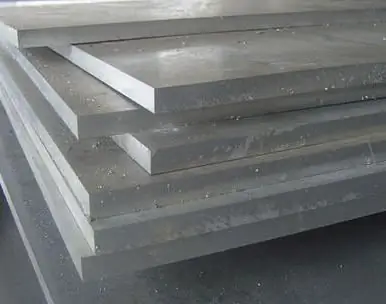
Research options
The indicator is a value called the hardness number. There are various methods for measuring the hardness of metals. The most accurate research is to use different types of calculation, indenters and appropriate hardness testers:
- Brinell: the essence of the apparatus is pressing a ball into the metal or alloy under study, calculating the diameter of the imprint and then mathematically calculating the mechanical parameter.
- Rockwell: A ball or diamond cone is used. The value is displayed on a scale or calculated.
- Vickers: The most accurate measurement of metal hardness using a diamond pyramidal tip.
There are special formulas and tables to determine parametric correspondences between indicators of different measurement methods for the same material.
Factors that determine measurement option
In laboratory conditions, with the necessary range of equipment, the choice of research method is carried out depending on certain characteristics of the workpiece.
- Indicative value of the mechanical parameter. For structural steels and materials with low hardness up to 450-650 HB, the Brinell method is used; for tool, alloy steels and other alloys - Rockwell; for hard alloys - Vickers.
- Dimensions of the test sample. Particularly small and delicate parts are examined withusing a Vickers hardness tester.
- The thickness of the metal at the measurement point, in particular the carburized or nitrided layer.
All requirements and compliances are documented by GOST.
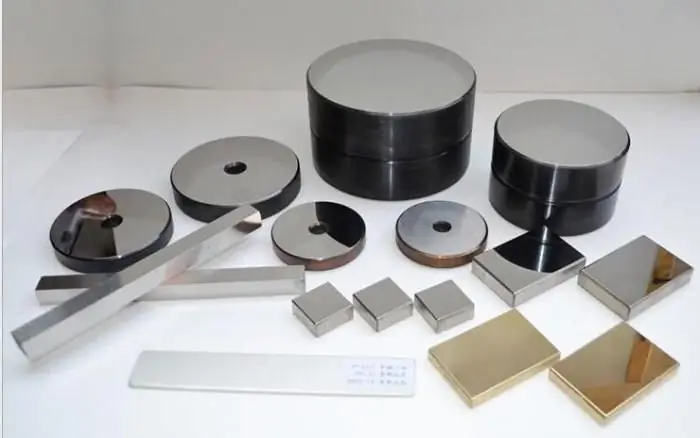
Features of the Brinell technique
Hardness testing of metals and alloys using a Brinell hardness tester is carried out with the following features:
- Indenter - a ball made of alloy steel or tungsten carbide alloy with a diameter of 1, 2, 2, 5, 5 or 10 mm (GOST 3722-81).
- Duration of static indentation: for cast iron and steel - 10-15 s, for non-ferrous alloys - 30, a duration of 60 s is also possible, and in some cases - 120 and 180 s.
- Limit value of mechanical parameter: 450 HB when measured with a steel ball; 650 HB when using carbide.
- Possible loads. Using the weights included in the kit, the actual deformation force on the test specimen is corrected. Their minimum allowable values: 153, 2, 187, 5, 250 N; maximum - 9807, 14710, 29420 N (GOST 23677-79).
Using formulas, depending on the diameter of the selected ball and on the material being tested, the appropriate allowable indentation force can be calculated.
| Alloy type | Mathematical load calculation |
| Steel, nickel and titanium alloys | 30D2 |
| Cast iron | 10D2, 30D2 |
| Copper and copper alloys | 5D2, 10D2, 30D2 |
| Light metals and alloys | 2, 5D2, 5D2, 10D2, 15D 2 |
| Lead, tin | 1D2 |
Notation example:
400HB10/1500/20, where 400HB is the Brinell hardness of the metal; 10 - ball diameter, 10 mm; 1500 - static load, 1500 kgf; 20 - period of indentation, 20 s.
To establish exact numbers, it is rational to examine the same sample in several places, and determine the overall result by finding the average of the obtained.
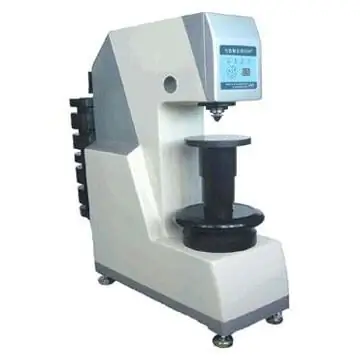
Brinell hardness test
The research process proceeds in the following sequence:
- Checking the part for compliance with the requirements (GOST 9012-59, GOST 2789).
- Checking the he alth of the device.
- Selecting the required ball, determining the possible force, setting weights for its formation, indentation period.
- Starting the hardness tester and deformation of the sample.
- Measuring the diameter of a recess.
- Empirical calculation.
НВ=F/A, where F is the load, kgf or N; A - imprint area, mm2.
НВ=(0, 102F)/(πDh), where D - ball diameter, mm; h - imprint depth, mm.
The hardness of metals measured by this method has an empirical relationship withcalculation of strength parameters. The method is accurate, especially for soft alloys. It is fundamental in systems for determining the values of this mechanical property.
Features of the Rockwell technique
This method of measurement was invented in the 20s of the XX century, more automated than the previous one. Used for harder materials. Its main characteristics (GOST 9013-59; GOST 23677-79):
- Presence of a primary load of 10 kgf.
- Holding period: 10-60 s.
- Boundary values of possible indicators: HRA: 20-88; HRB: 20-100; HRC: 20-70.
- The number is visualized on the dial of the hardness tester, it can also be calculated arithmetically.
- Scales and indenters. There are 11 different scales, depending on the type of indenter and the maximum allowable static load. Most commonly used: A, B and C.
A: Diamond cone tip, 120˚ point angle, 60kgf total static force, HRA; thin products are investigated, mainly rolled products.
C: Also 150kgf HRC diamond cone, suitable for hard and hardened materials.
B: 1.588 mm ball made of hardened steel or hard tungsten carbide, load 100 kgf, HRB, used to evaluate the hardness of annealed products.
The ball tip (1.588 mm) is applicable for Rockwell B, F, G scales. There are also E, H, K scales, for which a ball with a diameter of 3.175 mm (GOST 9013-59) is used.
Number of samples,made with a Rockwell hardness tester in one area is limited by the size of the part. A second test is allowed at a distance of 3-4 diameters from the previous place of deformation. The thickness of the product under test is also regulated. It should be no less than 10 times the depth of penetration of the tip.
Notation example:
50HRC - Rockwell hardness of metal, measured with a diamond tip, its number is 50.

Rockwell Study Plan
Measurement of metal hardness is more simplified than for the Brinell method.
- Estimating the dimensions and surface characteristics of a part.
- Checking the he alth of the device.
- Determine tip type and load capacity.
- Setting the pattern.
- The implementation of the primary force on the material, the value of 10 kgf.
- Making a full and appropriate effort.
- Reading the received number on the scale of the dial.
Mathematical calculation is also possible to accurately determine the mechanical parameter.
When using a diamond cone with a load of 60 or 150 kgf:
HR=100-((H-h)/0, 002;
when testing with a ball under a force of 100 kgf:
HR=130-((H-h)/0, 002, where h is the penetration depth of the indenter at a primary force of 10 kgf; H is the penetration depth of the indenter at full load; 0, 002 is a coefficient that regulates the amount of movement of the tip when the hardness number changes by 1 unit.
Rockwell's method is simple but not accurate enough. At the same time, it can measure the mechanical properties of hard metals and alloys.
Characteristics of the Vickers technique
Determining the hardness of metals using this method is the most simple and accurate. The work of the hardness tester is based on the indentation of a diamond pyramidal tip into the sample.
Main Features:
- Indenter: 136° apex diamond pyramid.
- Maximum permissible load: for alloyed cast iron and steel - 5-100 kgf; for copper alloys - 2.5-50 kgf; for aluminum and alloys based on it - 1-100 kgf.
- Static load holding period: 10 to 15 s.
- Tested materials: steel and non-ferrous metals with a hardness of more than 450-500 HB, including products after chemical heat treatment.
Notation example:
700HV20/15, where 700HV is the Vickers hardness number; 20 - load, 20 kgf; 15 - period of static effort, 15 s.

Vickers study sequence
The procedure is extremely simplified.
- Check sample and instrumentation. Particular attention is paid to the surface of the part.
- Choosing the allowable force.
- Installing the test material.
- Starting the hardness tester into operation.
- Read the result on the dial.
Mathematical calculation by this method is as follows:
HV=1, 8544(F/d2), where F is the load,kgf; d is the average value of the lengths of the imprint diagonals, mm.
It allows you to measure the hardness of metals, thin and small parts, while providing high accuracy of the result.
Methods of transition between scales
Having determined the diameter of the print using special equipment, you can use the tables to determine the hardness. The hardness table of metals is a proven assistant in the calculation of this mechanical parameter. So, if the Brinell value is known, the corresponding Vickers or Rockwell number can be easily determined.
Example of some matching values:
| Print diameter, mm | Research method | ||||
| Brinell | Rockwell | Vickers | |||
| A | C | B | |||
| 3, 90 | 241 | 62, 8 | 24, 0 | 99, 8 | 242 |
| 4, 09 | 218 | 60, 8 | 20, 3 | 96, 7 | 218 |
| 4, 20 | 206 | 59, 6 | 17, 9 | 94, 6 | 206 |
| 4, 99 | 143 | 49, 8 | - | 77, 6 | 143 |
The table of hardness of metals is compiled on the basis of experimental data and has high accuracy. There are also graphical dependences of Brinell hardness on the carbon content in the iron-carbon alloy. So, in accordance with such dependencies, for steel with the amount of carbon in the composition equal to 0.2%, it is 130 HB.

Sample Requirements
In accordance with the requirements of GOST, the tested parts must meet the following characteristics:
- The workpiece must be flat, lie firmly on the table of the hardness tester, its edges must be smooth or carefully processed.
- The surface should have minimal roughness. Must be sanded and cleaned, including with the help of chemical compounds. At the same time, during machining processes, it is important to prevent the formation of work hardening and an increase in the temperature of the treated layer.
- The part must comply with the selected method for determining hardness by parametric properties.
Fulfillment of primary requirements is a prerequisite for accurate measurements.
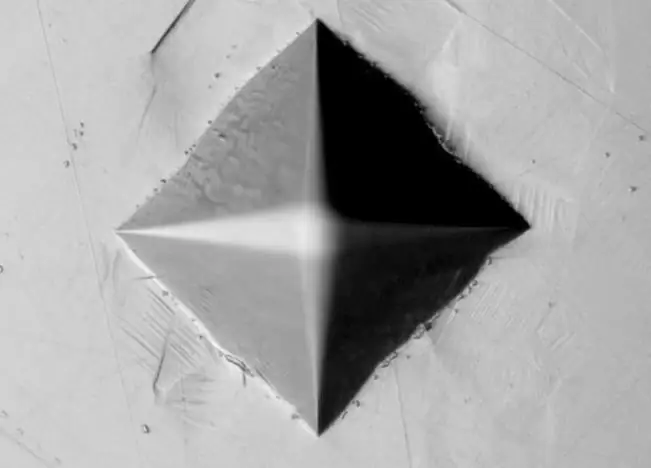
The hardness of metals is an important fundamental mechanical property that determines some of their other mechanical and technological features, the results of previous processing processes, the influence of time factors, and possible operating conditions. The choice of research methodology depends on the approximate characteristics of the sample, itsparameters and chemical composition.


